
Tulum, Mexico
This past March we took a family trip to Tulum Mexico to celebrate our parent’s anniversary and it was everything we dreamed of! Tulum is quickly becoming one of the hottest destinations in Mexico!
This was our first time truly exploring Mexico. We had visited twice before, once to the Beloved Hotel for our honeymoon, and once we took a Carnival Cruise (check out our travel video here) which stopped in Cozumel and Yucatan. However, we had never done Mexico on our own terms, aside from an all-inclusive resort or cruise! It took a good bit of planning but ended up probably being one of our favorite visits to Mexico!
We will go ahead and share with you all of the details of our trip including where we stayed, where we ate, and where we explored, etc. If you need some info, tips or inspiration for your own trip to Mexico we hope this will do it for you!
Before we get to the details, here are the quick facts & links for you!
QUICK LINKS
ACCOMMODATIONS
ACTIVITIES
EATS & DRINKS
Continue reading to get the inside scoop and tips for all of these places!
Flights

We flew Southwest Airlines from Atlanta Hartsfield Jackson (ATL) to Cancun International airport (CUN) with 1 stop in Houston Hobby International (HOU). We booked these flights using points and taking full advantage of our southwest companion pass! (Our friends Fostering Travel wrote a great article on how you can get this amazing travel perk yourself! You can check it out here.)
Booking a Rental Car in Mexico
While renting a car in Mexico is not exactly for the faint of heart, it also doesn’t have to be a nightmare. A little bit of research and awareness goes a long way. While talking about the ins and outs of car rentals in Mexico is probably worth a post in itself; I will say that our experience was overall virtually painless. We booked using rentalcars.com and found a weekly rate for $38 from Hertz that included the mandatory Mexican liability insurance. We then ended up purchasing insurance as well for an additional $96 making for a very reasonable grand total of $134 for the week for a standard 4 door automatic.
Note: While I had the option to use my Chase Saphire Reserve card CDW coverage for insurance, I opted not to for a couple reasons. First, rental companies in Mexico are extremely pushy with insurance and while I’m confident in my ability to talk my way around a sales pitch, I didnt’ really feel like picking a fight or getting on their bad side. Secondly, the way the insurance works is that I would be personally responsible to cover any damages to the vehicle before being allowed to leave the country. Then I would get reimbursed via my card member benefit once I got back…however I didn’t feel like risking time in a Mexican jail should I have any trouble coming up with the cash on the front end. So I opted to pay an extra $14/day for peace of mind.
Day 1
Our flight landed at Cancun airport’s brand new Terminal 4 at about 4:30 pm. We breezed through customs in about 5min and collected our baggage before stopping at the Hertz counter to be escorted to the shuttle that would take us to pick up our rental.
About an hour later we were on the road to Tulum! The drive took us about 2 hours and honestly was way better than I had imagined in my head. Proper highway driving the entire way.
We also stopped at the Walmart in Playa Del Carmen to pick up some breakfast foods and essentials for the air BnB for the week! We found prices to be about what you would expect from a Wal Mart in the US with the exception of their alcohol selection. This is definitely the place to pick up your bottle of tequila or rum for the trip! The prices were great and they had a wide variety.
We arrived at our condo in Aldea Zama at about 9 pm and settled in for the week!
Our Air Bnb

Image Courtesy of Air Bnb Host
Day 2
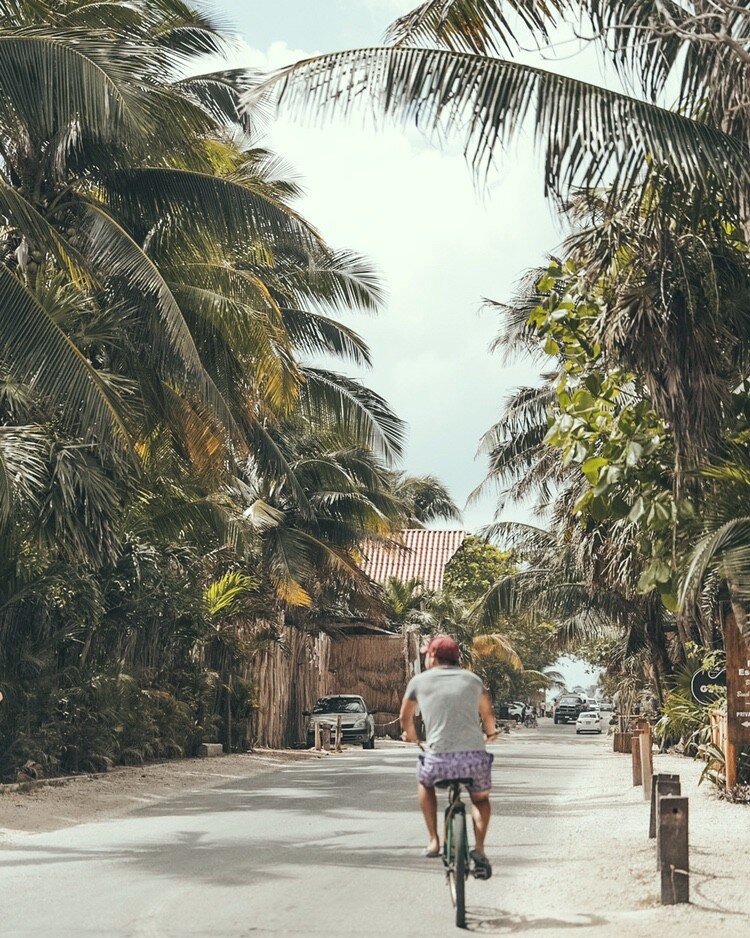
For our first full day in Tulum, we wanted to go check out the vibes on beach road, and I will say, they are glorious. The entire strip is an amazing mix of boho, chic, and hippie sort of vibe that is super laid back!
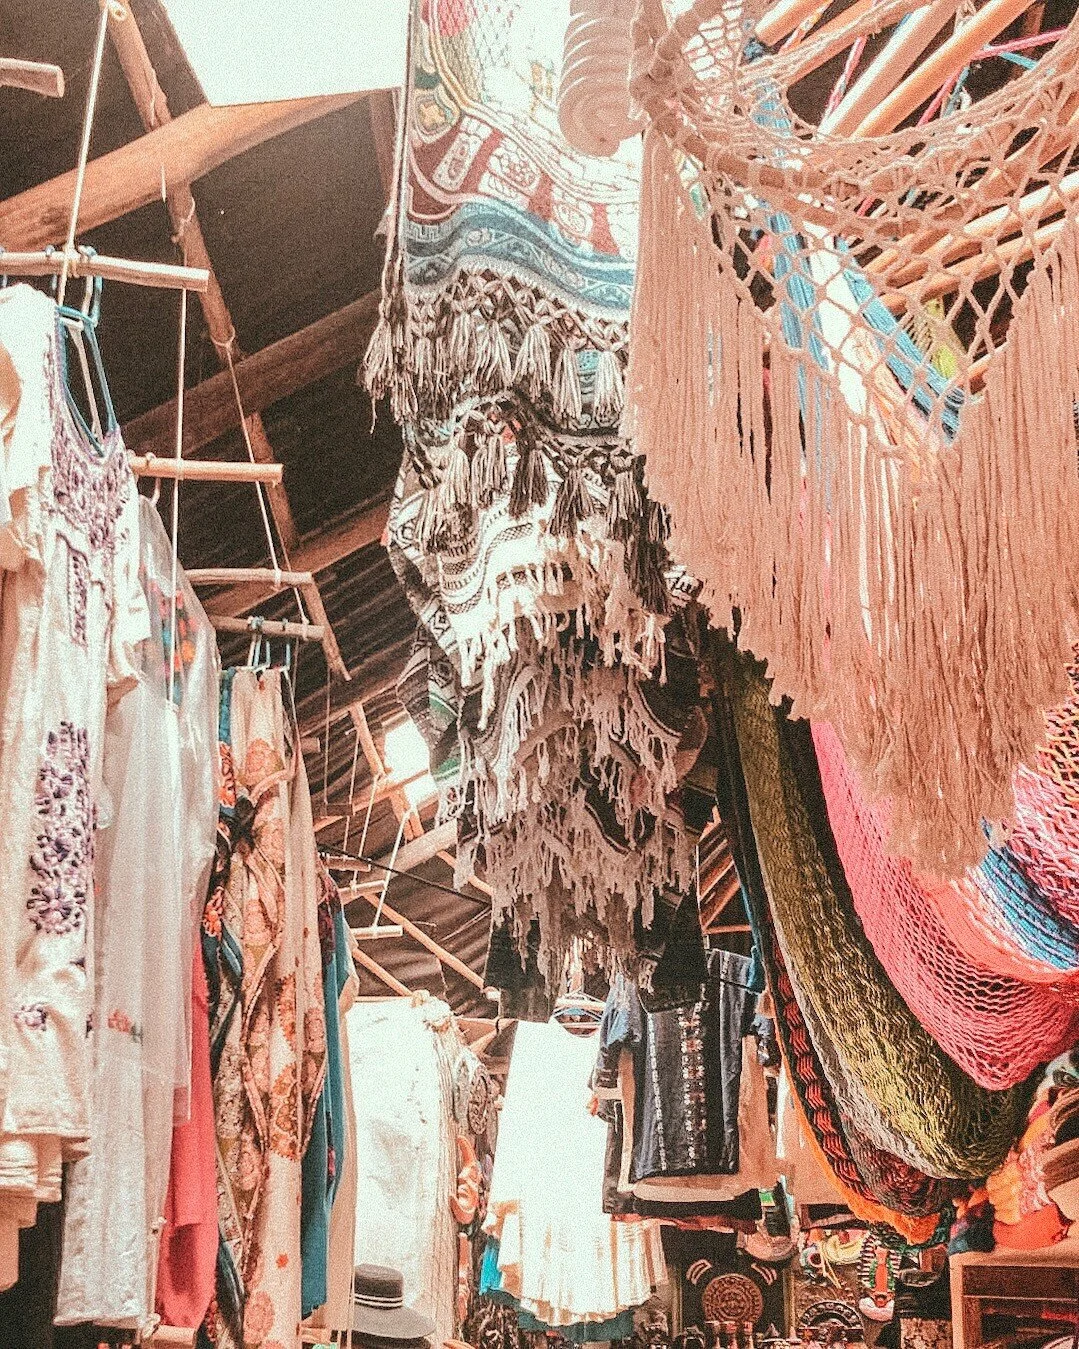
We spent a while checking out the various shops, looking at different crafts and souvenirs etc.
Pro Tip: Pure Mexican vanilla will change your life! If you see a bottle, pick it up! anywhere from 150–300pesos is a fair price price!price for a small bottle of it!
After working up a decent sweat from walking in the hot humid sun, we stopped at Campanella Creamerie to grab a mid-afternoon coffee and sweet treat. Their Cold Brew iced coffee was fantastic!

For dinner, we ate at Mateos. While it definitely wasn’t the cheapest place around (beach road is generally more expensive than other places around Tulum), we loved it!
Our Recommendations at mateos:
Mixed calamari — as an appetizer.
Fish tacos — They were some of the best I had our entire trip.
House Margarita — It was fantastic on the rocks and well priced as well.
Day 3
Coba Ruins
For Day 3 we were feeling a bit more adventurous, so we hopped in the car and made our way out to the Coba Ruins! These are some of the only ancient Mayan ruins that you are still allowed to touch and climb on and we think it’s 100% worth the short 1-hour drive from Tulum.
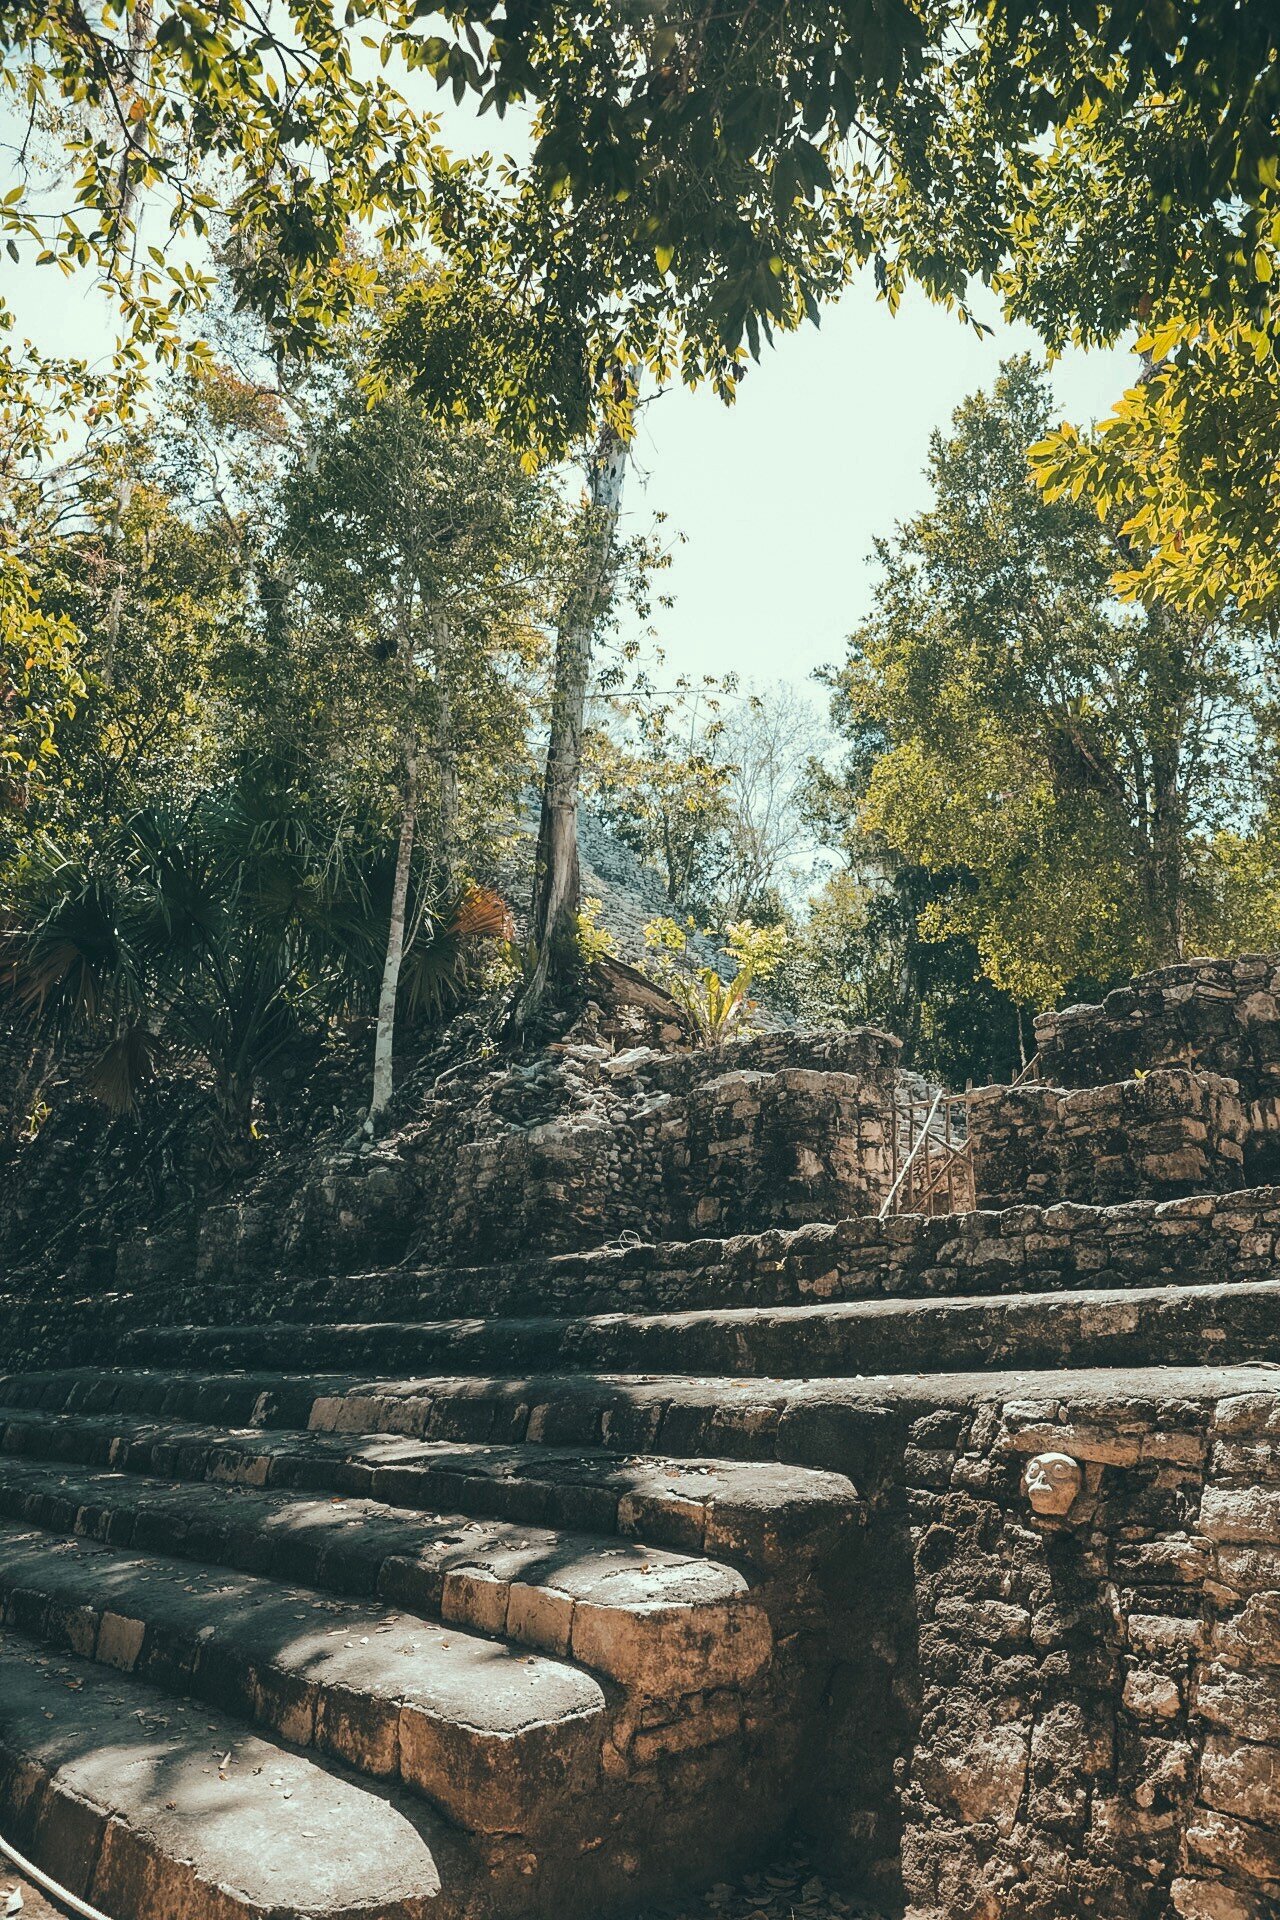

Unfortunately, the time that you are able to climb this amazing site may soon be coming to an end. There have been rumors that 2019 may be the final year that visitors are allowed to climb up to the top. While this is sad, it is in favor of preserving this amazing site! So get there while you still can!
The drive from Tulum to the Ruins was very easy and paved roads the entire way. When we arrived there were only a few small fees:
Parking: $50MXN
Entrance Fee: $120MXN / person
After climbing the ruins we had lunch at a fantastic restaurant just across the way in the same parking lot called “El Faisan”. Prices were very cheap ($5-$10 for an entree!)
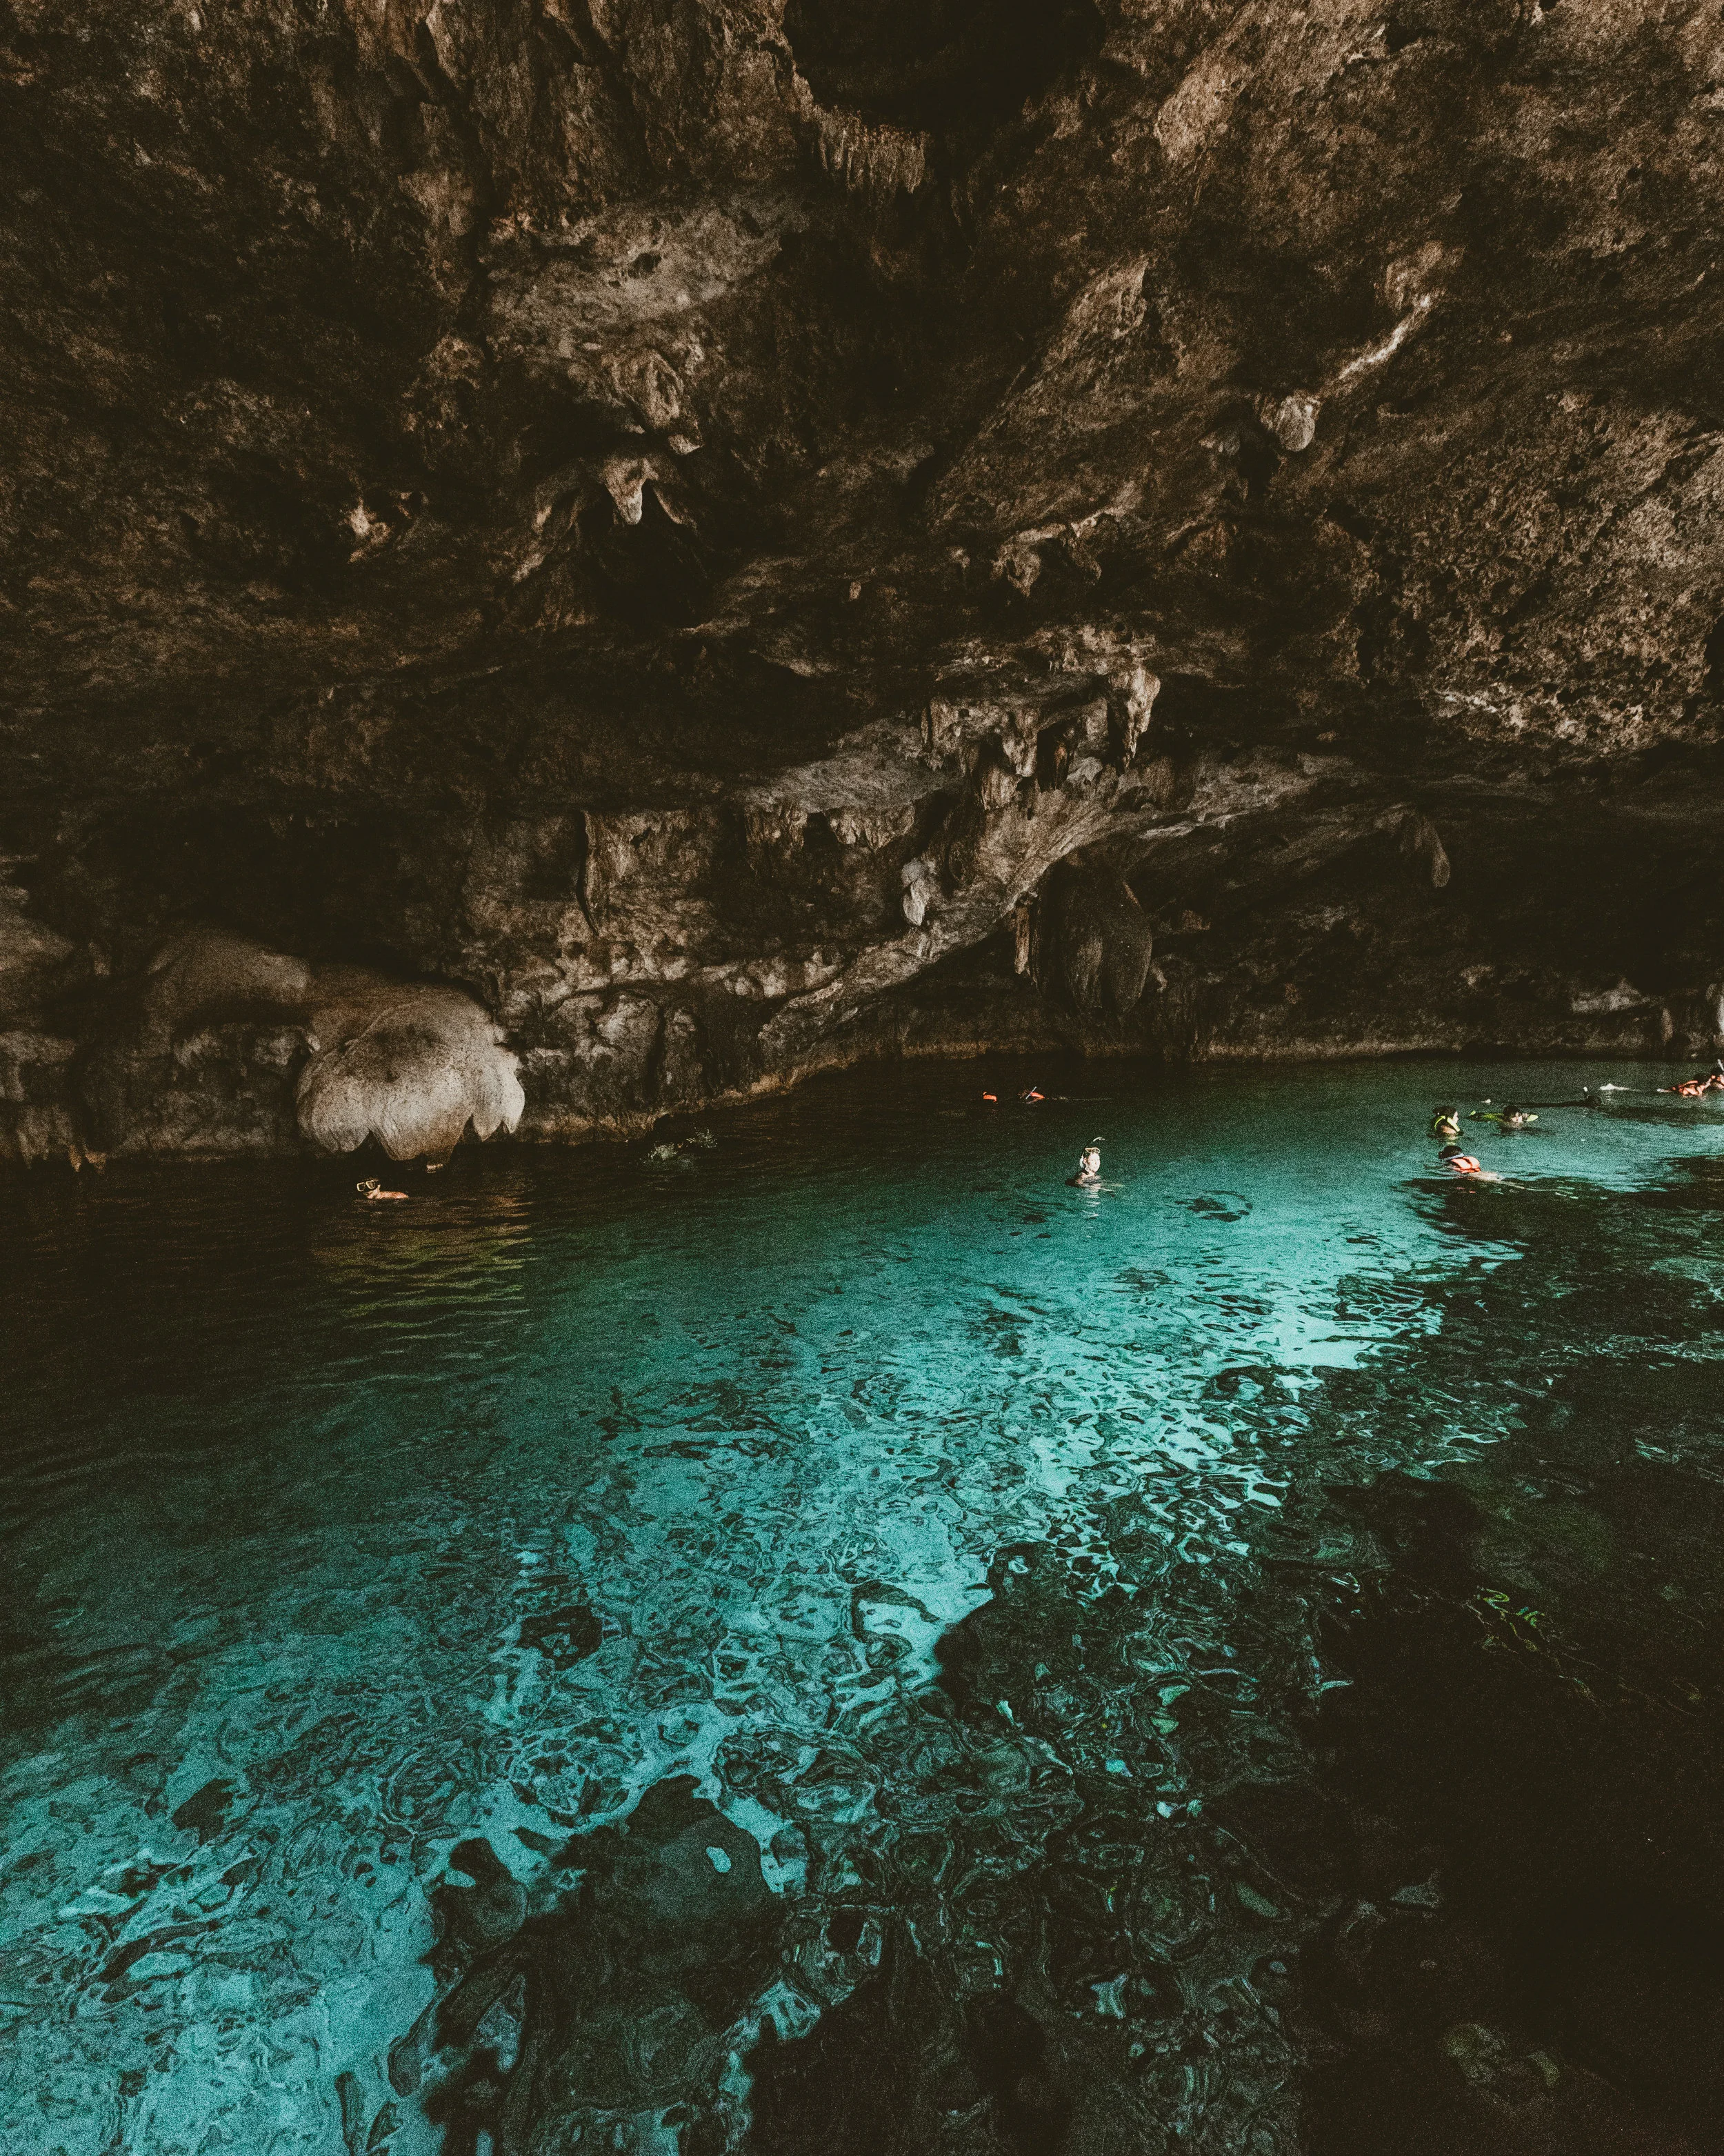
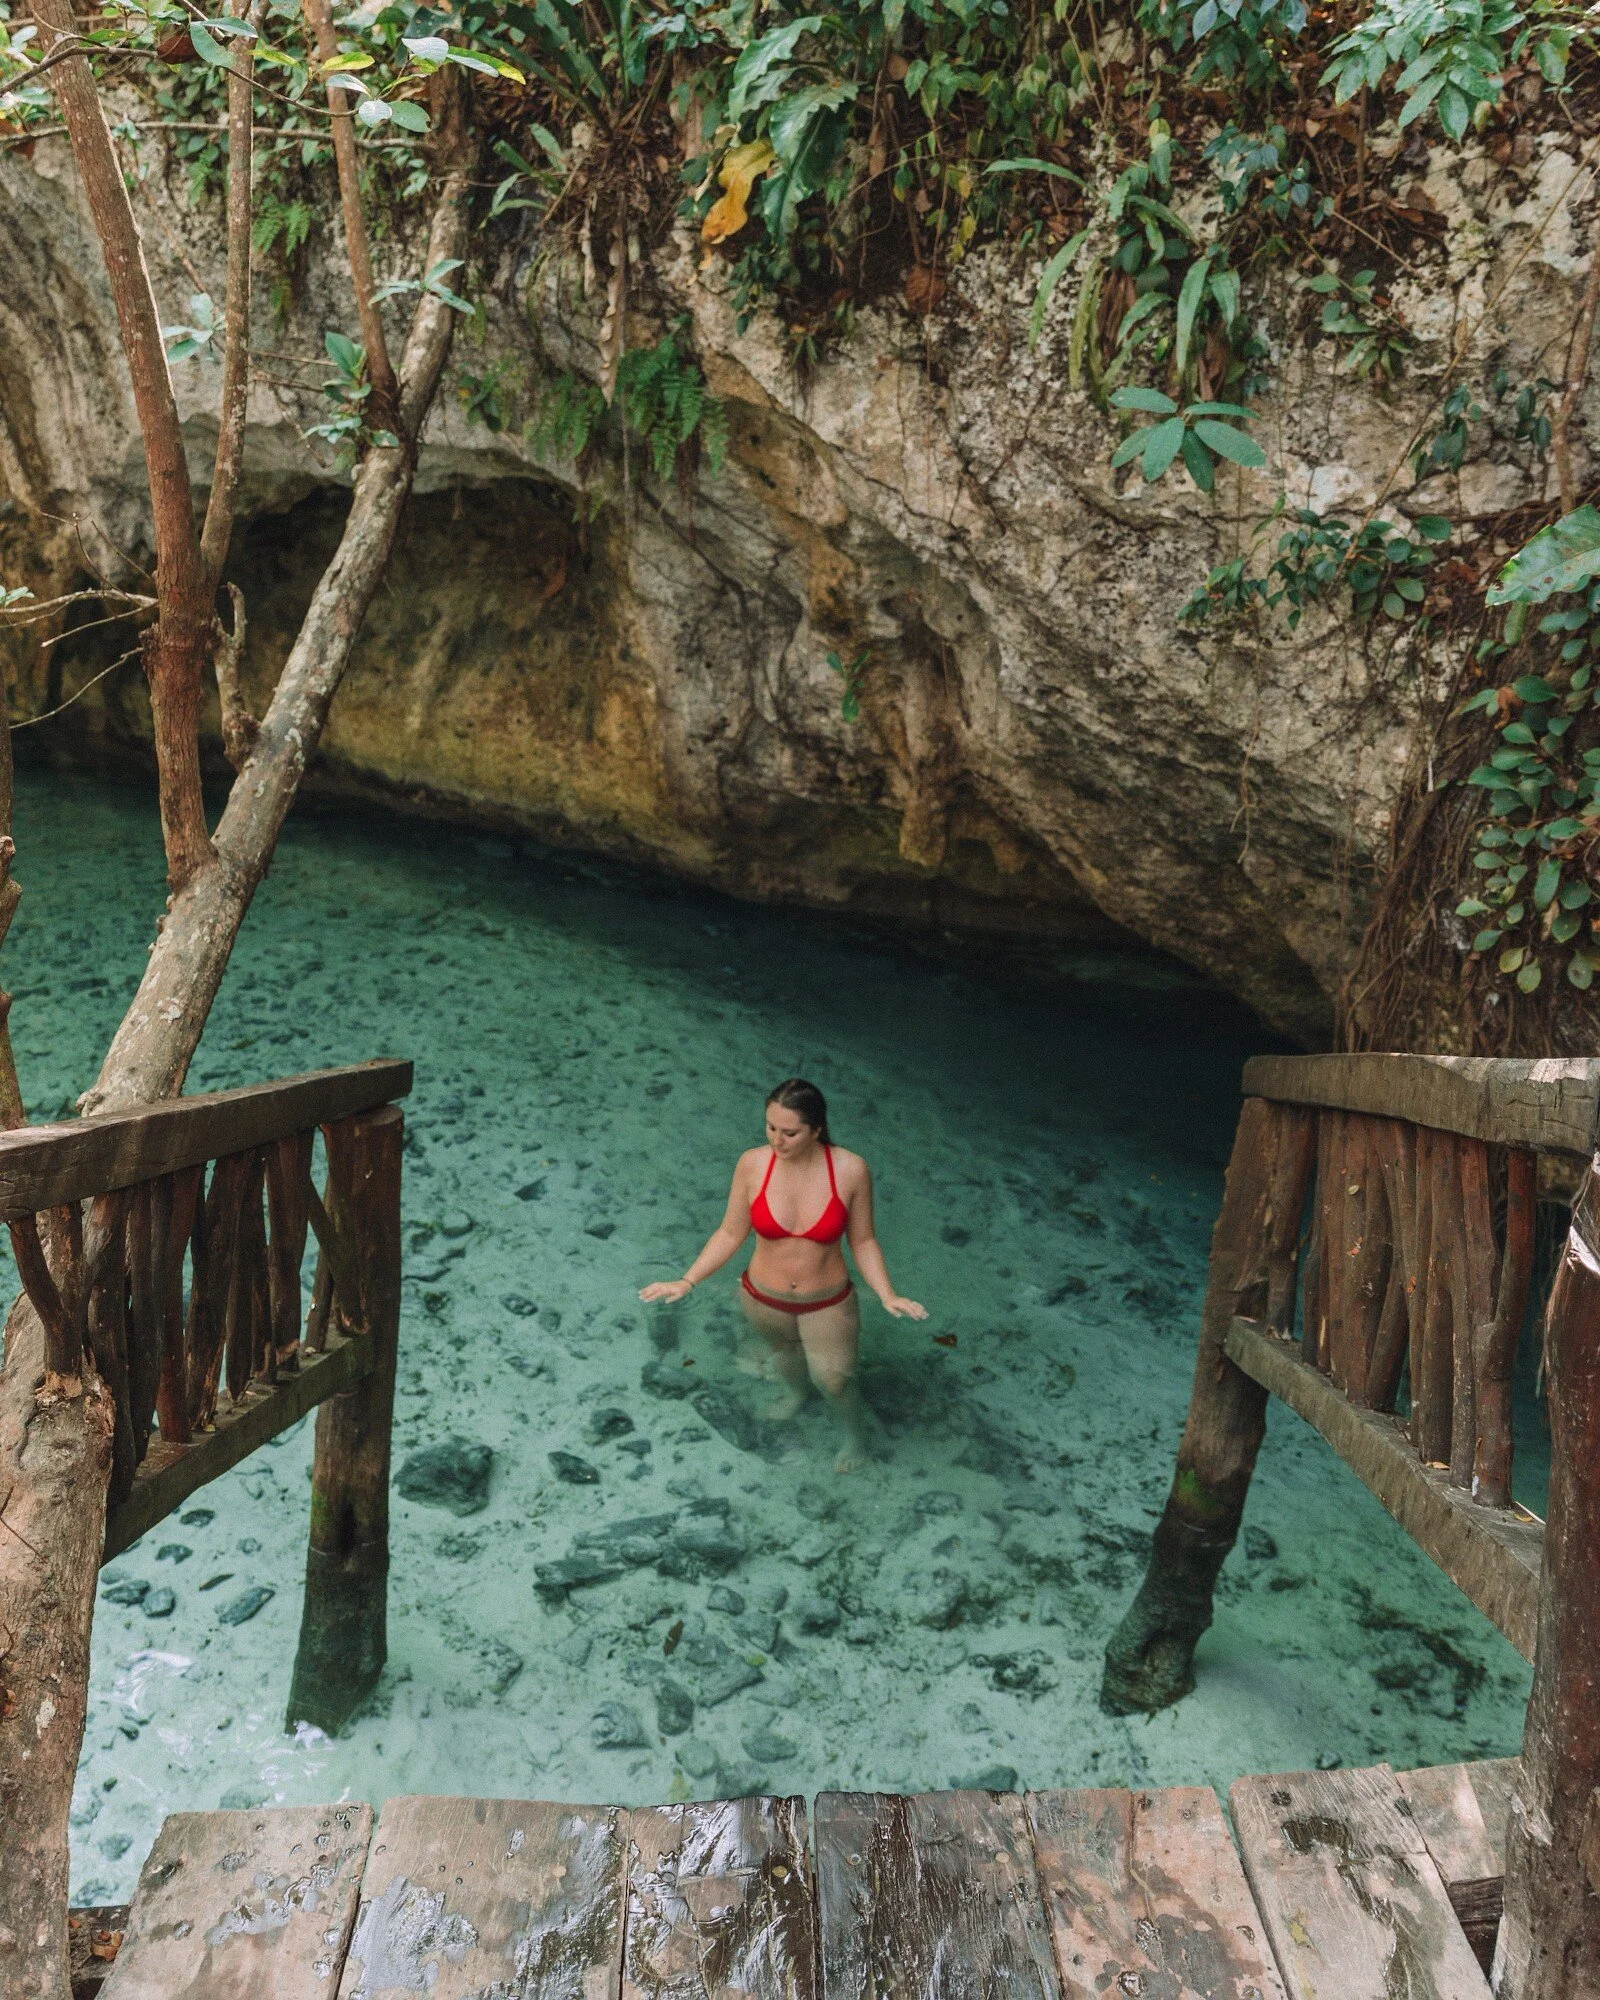
Cenote Multum-HA
After a sweaty trip climbing the Coba ruins and a large lunch, we were ready for somewhere to relax and cool off! Cenote Multum-Ha was amazing! At $100pesos/person it was very affordable and the PERFECT way to cool off!

Cenote Multum-Ha | $100pesos / person + Free Parking
In order to enter, you must rinse off first and then you head down a deep spiral staircase that lets you out at the bottom onto a wooden platform in a large dome cave. The water was incredibly clear and we couldn’t wait to jump right in!
Cenote Tankach-ha
While half of our party was ready to call it a day, some of us were hungry for more adventure! So we took the short 5min drive to another nearby cenote with a big jumping platform; cenote Tankach-ha! At this point is was about 4 pm and thankfully the places were starting to clear out as most of them close around sunset.

Cenote Tankach-Ha | $50pesos / person + Free Parking

The staircase down and the diving platforms
We had a BLAST in this place! While only one of us was brave enough to jump from the high platform (8m) we all jumped from the lower (4m) platform into the cold refreshing water. After hanging out for about 20min the place everyone had left and we had the entire place to just enjoy to ourselves! We spent plenty of time taking pictures and exploring the cenote with snorkels! We stayed until close and it was the perfect end to a fantastic day!
TIP** Centote Choo-Ha is right next to these other 2 cenotes and highly recommended. We ran out of time and weren’t able to get to it but if you’re in the area and hitting the other two you should definitley try to get this one in too!
Day 4
Playa Paraiso (Paradise Beach)
Being our 4th day in Tulum we knew it was about time to park ourselves on a beach!
There are TONS of beach clubs all down the main beach road in Tulum with all sorts of different menu’s and prices and policies, when we get a chance to go back and explore more of them we will definitely do an article just on the beach clubs!
We decided on Playa Paraiso for the day because we had heard great things about it and it’s definitely one of the prettiest beaches around! A quick breakdown on the pricing:
The beach club has multiple rows of chairs and tables with different prices but here’s what we were able to gather:
The front row closest to the beach was $400 pesos for 2 chairs with a $500 peso minimum spend; which is not hard to meet at all if you’re having lunch and drinks!
For the second row of chairs which have a little shade and come with a table and 4 plastic white chairs, it was $400pesos with a $1500peso minimum spend.
All in all, for our group, we paid $700 pesos for 4 beach loungers (2 in the front row and 2 in 2nd row) and a table for 4. We had a $1500 minimum spend for our group of 8 which we had 0 problems meeting!

Loungers at Playa Paraiso
For drinks, we enjoyed plenty of margaritas, maybe a few too many cervesas, and some killer smoothies. The highlights from lunch were definitely the steaks which surprisingly, were not very expensive and the fish tacos!
There were also massages available on the beach for $35 USD for an hour!
Playa Paraiso is also THE spot for the classic palm tree Instagram shot! We washed the line for this location ebb and flow all day long but eventually got in and got our shot!

Palm Tree at Playa Paraiso
Overall we 100% recommend doing a day at this beach as it is more than worth the price for the loungers and umbrellas, and beautiful water!
As far as Parking we found a spot maybe 1/4 mile down on beach road and used public beach access to get down to the water. Then we just walked down the beach to the club and they were more than willing to pull us in from the sand and sell us on some chairs!
However, there is a parking lot at the beach club and I believe it is free if you are planning to stay and spend money!
Day 5
After a full day at the beach were ready for some more sand-less water fun!
Gran Cenote
Gran Cenote, Tulum MX

Gran Cenote, Tulum MX
We highly encourage you to get to this cenote as early as possible! It’s one of the more popular cenotes in the area and we arrived at 9 am and still were sharing with plenty of other tourists.
The entrance fee was $200pesos per person ($10USD) and there were lockers available for rent for $30pesos and you must leave your ID with them when renting a locker.
This place was very strict about showering before you enter the cenote…they say your hair must be wet from the shower or they will not let you enter! It was a bit annoying for some of the ladies with us who weren’t initially planning on getting their hair wet, but oh well, it was worth it!

Snorkeling here was absolutely incredible!
Cenote Calavera

Cenote Calavera, Tulum MX
Cenote Calavera was such a trip! Perhaps you’ve seen the videos around the social media-sphere of people jumping into this dark hole that just displays a “Jump Here” sign. We had heard of this place and we knew we HAD to go find it! I won’t spoil it for you but once you jump in, the sunlight pouring in through opening illuminates the entire cave and you can see through the crystal clear blue water. The entrance fee was only about $50pesos per person and it was a very short walk from the parking lot off the main road. We spent about an hour there jumping in and swimming/snorkeling. There were also a few scuba divers that showed up while we were there who disappeared into the depths of the water! (No thank you!)
Bairado Burgers
After a morning full of snorkeling and swimming we had worked up a good-sized appetite, so we made our way to the downtown area for lunch at Bairado Burger! If you’re wanting a little taste of home in the form of a good burger, we definitely recommend this place!

Bairado Burger, downtown Tulum.
Caribe Mexicano
That evening we made our way to another downtown restaurant “Caribe Mexicano”. To our delight, we also discovered that they have happy hour from 8 pm-11 pm where you can get 2 margaritas for $100pesos ($5 USD)! Needless to say, we took full advantage (and unfortunately didn’t take any pictures!)
The food was so good that we ended up going back a 2nd time before we left to go back home! Their burritos, guacamole, and the surf and turf dish were all incredible!
Day 6
Snorkeling with Sea Turtles at Akumal Bay
Unfortunately, during our trip, there was a good amount of seaweed piled up along most of the beaches. So other than our day at Playa Paraiso, we really hadn’t spent much time at the actual beach. Thankfully, Akumal beach is set back on a bay and therefore there really isn’t any seaweed there, the water is extremely calm and the bottom is fine sand and seagrass which is exactly what attracts the sea turtles to the area! The beaches were pristine and the water was beautiful!
PRO TIP : Get there early in the day because as the day goes on and the beach gets busier, the water gets stirred up and becomes less and less clear. So if want to see the crystal clear water, get there as early as possible!
There’s a lot of conversation online about snorkeling at Akumal and the various costs associated with it, but I would love to share our experience with you and detail how we avoided paying the “entrance fee”, as well as how we negotiated for a guided snorkeling tour!
Quick Facts:
Parking: $50pesos
Tour: $350pesos / person (Included 2 guides, and all snorkel equipment)
Locker Rental : $7
We parked in the last lot on the left, just before the main square for $50pesos for the entire day, then proceeded to walk towards the main square to get to the beach.
It’s important to remember that Akumal beach is a public beach! You do not need to pay to access the beach. There are most likely several people you will pass on the way to the beach that will tell you otherwise, and we found them to be pushier here than we had experienced elsewhere in Mexico. There will be am OXXO convenience store (as well as a couple of others) before you get to the beach where you can stop to grab some bottled water or snacks. Go ahead and walk through the white arch and continue walking down (ignoring all the people trying to sell services or entrance wristbands) until you get to a dive shop on your right. You can get down to the beach for free by heading straight through the dive shop and out the backside which dumps you out right on the beach.
Once you’re down on the beach you can rent chairs and lockers from the lol-ha beach club if that’s your thing.
Once we were on the beach (not before!) we found a snorkeling guide and paid $350pesos per person for a guided snorkel with the sea turtles! This included 2 guides, and snorkels and live vests for everyone.
The tour lasted about 45min and we saw several sea turtles and other sea life. The guides were great at pointing out the sea life and helping to make sure everyone got a chance to see them!
After a good snorkel, we had all worked up an appetite so we grabbed lunch at the lol-ha restaurant right there on the beach.
DAY 7
Our final full day in Tulum we wanted to go ahead and visit a few more Cenotes! Our minds were blwon away at how beautiful they were. So We went to 2 final cenotes:
Cenote Corazon de Paraiso - 100pesos
Cenote cristal - 100 pesos
While both of these cenotes were outdoors, almost like a lake, they honestly were some of our favorites of the entire trip! The sun hitting the water made sure you could see all the way to the bottom. And under the surface was just teeming with all sorts of amazing things to look at! We ended up spending hours here before we finally had to leave to get something to eat for lunch!
Quick note for Cenote Corzaon de Paraiso — we missed the turn off twice! We almost missed it a 3rd time but then noticed what seemed to be more of a path than a road. We had to drive back on that tiny road for almost a full 5 minutes before we finally came out on a parking lot! So if you’re going to visit this one, just keep on driving! You might think you’re going the wrong way, but we promise you’ll get there!
For lunch we made our way back into town to Don Cafeto where I probably had the best steak burrito of the trip! SO so good!
That evening, Autumn and I wanted to go have drinks at the infamous Azulik Resort! It can be fairly busy so we went ahead and called that afternoon to let them know we’d be coming!
A couple notes:
Kin-Toh (The restaurant at the Azulik) has $565peso (approx $30USD) cover charge for non-guests. However, this charge credits to your bill.
Mezcal cocktails were $290pesos (about $15USD) and were delicious!
Other Cocktails ranged anywhere from $290-$400 ($15USD - $20USD)
So as long as you’re planning on having at least a couple drinks, the cover charge shouldn’t phase you!
After drinks, we met back up with the rest of the family for dinner at Estencia jujeana right on the main strip downtown. This was SUCH a good choice and we had everything from delicious pastas to perfectly grilled steaks.
I also asked the bartender to create something for me I would remember…and he came through! I wish I could tell you what it was he made me, but it was whiskey-based and involved fire and show! Best cocktail I’ve ever had in Mexico. So if you’re the adventurous type, hit up this place and ask the bartender to make you something special!
Also, don’t skip out on dessert here, their house-made flan is to DIE for!!
While Tulum was such a beautiful town, it’s worth noting that just like anywhere, it’s important to be safe, and very aware of your surroundings. With that said, we never once felt any more un-safe in Tulum than we do in any other city. We definitely don’t think anyone should be afraid to visit. It is SO worth seeing and quite the experience!
As always if you have any questions don’t hesitate to reach out!
~ Happy Travels!